busy-board-for-kids-at-home-sheikhupura
Busy Board for Kids at Home Sheikhupura, There is something wonderfully old-fashioned about a busy board. In a world overflowing with plastic gadgets, blinking lights, and screens that do everything for a child, a busy board asks something different — it asks a little one to figure things out. A buckle that does not fasten itself. A bolt that will only turn if you grip it right. A latch that opens only when you push it at the correct angle. These are small victories, but for a toddler, they feel enormous. Watching a two-year-old work a deadbolt open for the first time, tongue poking out in concentration, is one of those quiet parenting moments that stays with you.
Busy boards — sometimes called activity boards or sensory boards — are hands-on learning tools built from everyday objects mounted onto a flat surface. They build fine motor skills, encourage problem-solving, and keep little hands occupied in a genuinely productive way. The best part? You do not need a woodworking shop or an engineering degree to make one. With a trip to the hardware store, a board from your garage, and an afternoon free, you can put together something that your child will use for years.
This guide walks you through everything — from choosing the right base board, to selecting age-appropriate activities, to putting the whole thing together safely. puzzles for kids, Whether you are a first-time DIY parent or someone who builds furniture on weekends, there is a version of this project that is right for you.
Short Answer About Busy Board for Kids
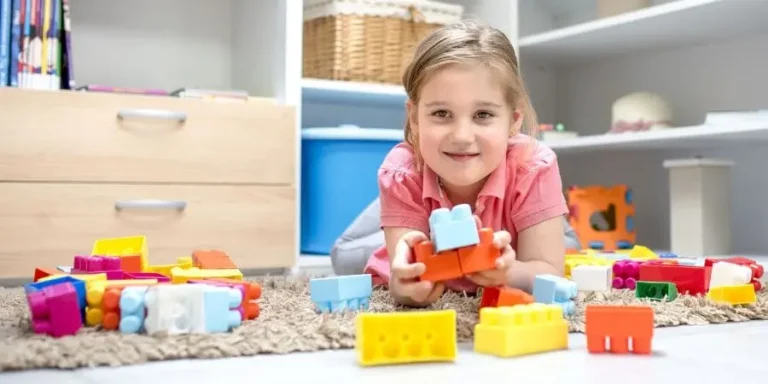
Busy Board for Kids at Home Sheikhupura is a fun and educational activity board designed to keep little hands engaged in meaningful play. It usually includes simple everyday items like zippers, buttons, locks, switches, laces, and spinning gears attached to a sturdy board. These small tasks may look simple, but they help children improve fine motor skills, hand-eye coordination, and problem-solving abilities.
Busy boards are especially great for toddlers who are naturally curious and love to explore how things work. Instead of playing with unsafe household items, children can safely practice opening latches, tying laces, or flipping switches on their own board. This builds confidence and encourages independent learning. toys for 5 year old boys,
Parents also appreciate busy boards because they offer screen-free entertainment at home. Whether used during quiet time or travel, a busy board keeps children focused, calm, and happily learning through play. It is a simple yet powerful tool that supports early childhood development in a creative and enjoyable way.
What Exactly Is a Busy Board
A busy board is essentially a flat panel — wood, foam, or corkboard — covered in interactive elements that a child can touch, twist, zip, snap, press, and explore. The concept has roots in Montessori education, where the idea is that children learn best by doing, and that real objects teach far more than toy imitations of them. A real lock teaches a child about resistance, persistence, and reward. A toy lock that barely clicks teaches very little.
blocks for kids, Busy boards have surged in popularity over the past decade, partly because parents are looking for screen-free alternatives and partly because people have realized how straightforward they are to make. You can spend a fortune buying a professionally made sensory board online, or you can spend very little and build something far more personal, sturdier, and tailored exactly to your child’s interests and skill level.
Children between the ages of 12 months and five years get the most out of busy boards, though the activities change as they grow. A one-year-old might spend twenty minutes sliding a bolt back and forth, while a four-year-old will work their way through every element with practiced speed before rearranging them to their own liking. The board grows with the child if you plan it that way.
Why Make One at Home?
Store-bought busy boards are available in abundance, but homemade ones beat them on almost every count. When you build your own, you control the quality of every component. You know whether the screws are countersunk properly, whether the edges are sanded smooth, and whether the paint used is non-toxic. With a commercial board, you are trusting a manufacturer you have never met.
Cost is the other obvious factor. playdough for kids, A basic homemade busy board can be assembled for well under thirty dollars, depending on what you already have around the house. Hardware store items — hinges, hooks, latches, bicycle bells, carabiners, light switches, cabinet knobs — are inexpensive individually and you can mix and match to your heart’s content. A comparable board sold online might cost five times as much.
There is also the satisfaction of making something with your own hands for your child. Children often have a special attachment to things made by their parents. And frankly, there is something deeply enjoyable about standing in a hardware aisle, picking up a brass hook, and thinking: yes, my kid is going to love this.
Choosing Your Base Board
The base is the foundation of the whole project, so it pays to think it through. You have several options and each has its own advantages.
Plywood
This is the most popular choice and the one most builders recommend. A half-inch or three-quarter-inch piece of plywood is thick enough to hold screws firmly without splitting, light enough to hang on a wall, and readily available in any hardware store. You can cut it to whatever size suits your space. A board roughly two feet by three feet gives you plenty of room to work with without being overwhelming for a small child.
doctor set, Sand the edges thoroughly — every edge and corner — before doing anything else. Plywood can have surprisingly sharp edges that you do not notice until your child runs a hand along it at speed. Go over everything twice. Then seal the wood with a coat of child-safe paint or clear varnish to prevent splinters and make it easier to wipe clean.
Foam Board or Corkboard
For a lighter, simpler version — especially if your child is under eighteen months — a thick foam or cork board can work well. These are easier to pin and attach lightweight items to, and there is no risk of splinters. The downside is that they cannot handle heavy components and screws will not hold reliably. Stick to lighter elements like fabric pieces, velcro, ribbons, and soft sensory textures if you go this route.
Repurposed Cabinet Doors or Cutting Boards
If you have an old cabinet door sitting in the garage, it makes an excellent base. It is already sanded, often already finished, and built to last. magnetic drawing board, Thick wooden cutting boards work similarly. These are not always the right shape or size, but if you have one that fits, do not overlook it. Upcycling is very much in the spirit of the project.
Picking the Right Activities for Your Child’s Age
Not every element is right for every age. Small parts are dangerous for babies and young toddlers. Activities that require too much dexterity frustrate children who are not developmentally ready for them. Here is a rough guide to what works when.
12 to 18 Months
wooden puzzle, At this stage, babies are just starting to develop a pincer grip and love anything they can push, pull, or bat. Good elements include large wooden knobs, simple hinges, a bicycle bell, smooth sliding bolts (the kind with no sharp edges), fabric scraps in different textures, and large buttons sewn onto thick felt. Avoid anything with small parts that could come loose, and avoid anything with sharp edges or points.
18 Months to 3 Years
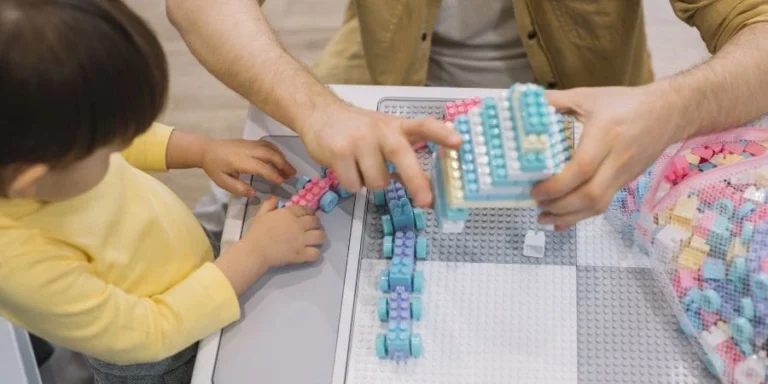
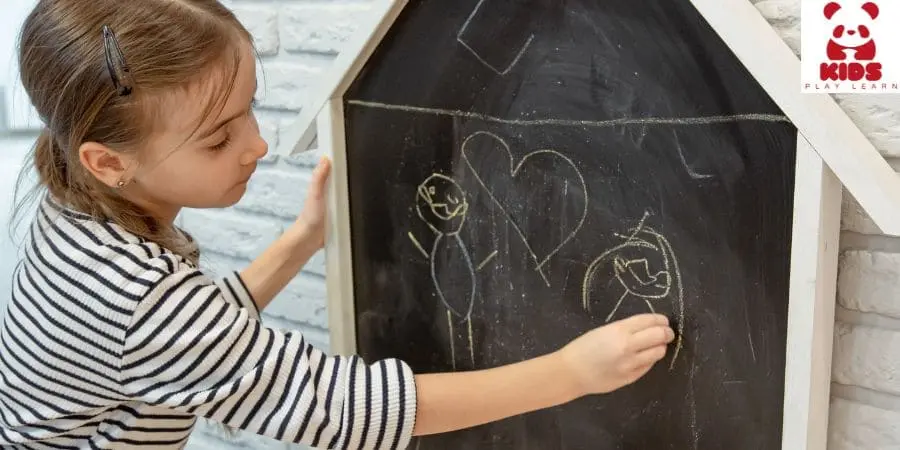
This is the sweet spot for busy boards. Children this age are obsessed with figuring out how things work and have the manual control to actually do it. You can add padlocks with keys, simple buckles, zippers, hook-and-eye latches, light switches (non-functional, mounted for practice), carabiner clips, rotary dials, door chains, and shape-sorting elements. A small chalkboard square mounted to one corner works beautifully at this age too.
3 to 5 Years
Older children are ready for more complex challenges. Combination padlocks, lace-up sections, number or letter tiles, abacus rows, working clocks with movable hands, and multi-step latches keep them engaged. At this stage the board can become almost a puzzle they set for themselves, rearranging and revisiting elements in new ways.
A Comprehensive List of Elements to Include
You will not fit everything on a single board, and you should not try. Choose six to twelve elements that feel right for your child and your space. Here is a broad list to browse through when planning your design.
Hardware elements: sliding barrel bolts, door chain latches, deadbolts, padlocks with keys, hook-and-eye latches, cabinet knobs and pulls, drawer handles, door hinges, piano hinges, barrel hinges, toggle switches, light switches, key locks, combination locks, and carabiner clips.
Mechanical and interactive elements: bicycle bells, gear sets (from old clocks or toys), abacus beads on a rod, spinning wheels, rolling casters, pulley systems with a small rope, and rotary phone dials.
Soft and fabric elements: zippers of different sizes, velcro strips, shoelaces for tying practice, buttons and buttonholes, ribbon loops, buckle straps (from old bags or baby gear), snap fasteners, and fabric pockets with things hidden inside.
Sensory and creative elements: small mirror tiles, a piece of sandpaper, swatch of faux fur, corrugated cardboard section, a small chalkboard, a wooden bead maze track, a section of bubble wrap sealed under clear contact paper, and a small magnifying glass on a cord.
Tools and Materials You Will Need
You do not need a workshop. A handful of basic tools will get the job done. Gather a power drill with appropriate drill bits, a screwdriver set, sandpaper in two or three grits (80, 150, and 220 works well), child-safe paint or clear varnish, a paintbrush, measuring tape, a pencil for marking, and a saw if you need to cut the board to size.
For mounting the board itself, you will want D-ring picture hooks or French cleats for wall mounting, or non-slip feet if you plan to stand it on the floor or lean it against a wall. Consider the height your child will use it at — for young toddlers, floor level or low wall mounting works best.
In terms of fasteners, stock up on wood screws in a few different lengths, washers, and some heavy-duty craft glue for any elements you want extra security on. Zip ties are useful for attaching things like bicycle bells or small gear sets that do not have a natural screw mount.
Step-by-Step: Building Your Busy Board
Step One: Plan Your Layout
Before you drill a single hole, lay all your elements out on the board and move them around until you are happy with the arrangement. Think about spacing — elements that are too close together make it hard for small hands to work them independently. Heavier or larger items generally look better anchored at the bottom or in the center. Colorful or visually interesting items can go toward the top where they will catch a child’s eye first.
Take a photograph of your layout before you start drilling. This gives you a reference to return to if you forget your placement midway through.
Step Two: Sand and Finish the Board
If you have not already done this, sand the board now — all surfaces, all edges, all corners. Start with 80-grit to remove any roughness, move to 150-grit to smooth it out, and finish with 220-grit for a surface that feels soft to the touch. Wipe off the dust with a damp cloth and let it dry fully before painting.
Apply one or two coats of child-safe paint in whatever color you like. Some parents go for a simple white or natural wood look; others paint each section a different color to create visual zones. Let the paint cure completely — at least 24 hours — before attaching anything.
Step Three: Attach the Hardware
Work from your photo or memory of the layout. Mark each mounting point with a pencil. Pre-drill holes where screws will go — this prevents the wood from splitting and makes driving screws much easier. Use screws that are long enough to grip the wood firmly but not so long that they poke out the back. If a screw tip does come through, cover it with a dab of epoxy or a rubber screw cap immediately.
Attach each element firmly and then try to wiggle it loose with reasonable force. If something gives way, reinforce it with a washer, additional screw, or a bead of wood glue. An element that pulls free in a child’s hands is a safety hazard, not just a nuisance.
Step Four: Attach the Fabric and Soft Elements
Fabric elements like zippers, buckles, shoelace boards, and velcro patches are best attached with a combination of screws through a small wooden backing piece and strong fabric glue. Cut a piece of thin plywood or MDF to back each fabric element, staple or glue the fabric to it, then screw the whole thing to the board. This approach is much more durable than gluing fabric directly to the board.
Step Five: Final Safety Check
Run your hand over every surface. Feel for rough patches, exposed screw tips, sharp edges, or loose elements. Check the back of the board to make sure nothing protrudes dangerously. Look for any parts that are small enough to be swallowed — pieces under an inch and a half in any dimension should either be secured so firmly they cannot come off, or replaced with something larger.
Shake the board gently. Nothing should rattle loose. If something does, fix it before introducing the board to your child.
Mounting and Display Options
How you mount the board matters both for safety and for usability. A board propped against a wall can tip forward, which is a risk with young children. Wall mounting is the safest approach. Use a French cleat for heavier boards — this is a two-part interlocking system that makes the board very secure and easy to reposition. D-ring picture hooks are fine for lighter boards.
Mount the board at your child’s chest height, not eye height. Children interact with things most naturally when the activity is between waist and shoulder level. If the board is too high, small children will strain to reach it and lose interest quickly.
If wall mounting is not an option, build or buy a simple wooden frame stand that lets the board lean at a gentle angle. Add rubber feet to both the board and the stand legs to prevent sliding on smooth floors.
Safety Principles to Keep in Mind at Every Stage
Safety is not a step in the process — it is a lens you apply throughout. Every decision you make, from which board to choose to which screws to use, should pass through a safety filter.
Use non-toxic finishes only. This means checking that paints, varnishes, glues, and sealants are labeled food-safe or child-safe, not just low-VOC. Young children mouth things constantly, and the surface of a busy board will be licked. Plan accordingly.
Avoid anything with magnets if your child is under three. Rare-earth magnets that separate and are swallowed can cause serious internal injuries. Similarly, avoid small batteries and anything with electrical components unless you are absolutely certain the wiring is sealed and secure.
Do the toilet-roll tube test for any piece you are unsure about: if an object fits entirely inside a toilet paper roll, it is too small for children under three. This is a simple, practical standard that is easy to apply in the hardware aisle.
Inspect the board every few weeks, especially in the early months. Children are remarkably good at working things loose that you thought were fixed permanently. A five-minute inspection with a screwdriver keeps everything secure.
Keeping It Fresh: Rotating and Updating Your Board
Children are creatures of novelty. Even the most enthusiastic toddler will eventually lose interest in a board they have mastered fully. The solution is simple: rotate elements in and out over time. Remove things your child has completely figured out and replace them with new challenges at a slightly higher level.
If you have designed the board with screw-mounted elements rather than permanent glue, this is straightforward. Keep a small box of elements in storage — the things you removed — and pull them out a few months later. Children often approach familiar things with fresh interest after a break, especially if they have grown in the meantime.
You can also involve older children in designing their own updates. A three or four year old who gets to choose what goes on the board next has a different relationship with it than one who simply receives whatever a parent chose. Asking a child what they find interesting at the hardware store is one of those quietly excellent parenting moments.
Budget-Friendly Tips and Where to Source Materials
A busy board does not need to be expensive. Start by looking around your own home. Old cabinet hardware, spare hinges from a renovation, a broken bicycle bell, a retired padlock and key — these are all treasure if you are building a busy board. Check the junk drawer, the garage, the shed.
Thrift stores and yard sales are excellent sources for hardware and fabric elements. People regularly donate or sell old bags, belts, and purses that are rich in zippers, buckles, and snaps. You can pick these up for almost nothing and harvest every element from them.
For new hardware, large discount stores and online marketplaces often sell multi-packs of hooks, latches, and knobs at a fraction of what individual pieces cost at specialty stores. Buy in bulk if you plan to rotate elements — you will use them eventually.
The plywood itself is the biggest expense for most builders. Check whether any local lumber yards or hardware stores sell offcuts. These are end pieces from larger sheets that are too small for most projects but often perfectly sized for a busy board. They are usually sold at a steep discount or given away.
A Few Themed Board Ideas to Inspire You
Sometimes the hardest part is knowing where to start. Here are a few themed concepts that tend to work well and give the design a coherent feel.
The House Board. Everything on it is something you might find on a door: deadbolts, door chains, peepholes, cabinet knobs, hinges, a door knocker. Paint the board to look like a door. Children this age are often fascinated by doors and this plays directly into that.
The Travel Board. Fill it with elements from bags and luggage: zippers, luggage locks, combination padlocks, buckle straps, carabiners, a small compass, a tiny chalkboard for drawing maps. Great for children who love adventure stories.
The Mechanic Board. Bolts, wing nuts, gears, switches, a bicycle bell, a key ignition (salvaged from an old toy), a dashboard knob or two. This is always popular with children who love vehicles.
The Nature Board. Incorporate natural textures — a square of bark, a piece of smooth river stone mounted flat, dried moss sealed under resin, a section of rope in different thicknesses, a small mirror that reflects the sky. A calmer, more sensory-focused option for children who love the outdoors.
Final Thoughts
Building a busy board is one of those projects that rewards you twice. Once when you finish it and feel the satisfaction of having made something real with your hands. And again, over and over, each time you watch your child sit down in front of it and get completely absorbed. The focused silence of a toddler working a latch, trying different approaches until it gives — that is exactly the kind of play that builds patience, dexterity, and quiet confidence.
It does not need to be perfect. It does not need to look like the ones you see in beautifully lit photos online. It just needs to be safe, secure, and stocked with things that will make your child stop and think. A slightly wonky bolt that still turns is infinitely better than a sleek toy that does the thinking for them.
Take an afternoon. Gather your materials. Sand the edges smooth and get every screw tight. Then step back and let your child discover it at their own pace. There is a very good chance they will teach you something about persistence before the day is out.
FAQs
What age is best for a busy board?
Children between 12 months and 5 years benefit most. Younger toddlers enjoy simple knobs and bolts, while older kids can handle locks, zippers, and combination padlocks.
How much does it cost to make a busy board at home?
A basic homemade busy board can cost under $30, especially if you reuse old cabinet hardware, hinges, or buckles you already have at home.
What is the safest base material to use?
Half-inch or three-quarter-inch plywood is the top choice. It holds screws firmly, is lightweight enough to wall-mount, and becomes safe and smooth after proper sanding and non-toxic sealing.
How do I keep my child interested in the board over time?
Rotate elements every few weeks. Remove activities your child has mastered and replace them with new challenges. Involving your child in choosing new pieces also keeps their excitement alive.
Are busy boards safe for babies under 18 months?
Yes, with the right elements. Avoid small parts, sharp edges, and magnets. Stick to large knobs, smooth sliding bolts, fabric textures, and big buttons. Always do the toilet-roll tube test — if a piece fits inside, it is too small for young children.

“Hi, I’m Turab Sheikh, the founder of Kids Play Learn. With 2+ years of experience in creating safe and educational toys, I’m passionate about helping children learn, play, and grow in a fun way every day, and I focus on providing toys that inspire creativity, curiosity, and joyful learning.”